Course Summary

Welcome to the Huon Valley Golf Club course guide – we can guarantee that the real thing is a lot more fun than the summary that follows! We are extremely lucky to have occupied our current site since 1969, when a group of dedicated members developed a unique 12 hole parkland style of course that is located next to the beautiful Huon River. The course is beautifully maintained by a band of dedicated volunteers, who do an amazing job to prepare the course week in week out and our course is regularly recognised by visitors for its great playing surfaces.

The course itself is characterised by generally small, raised greens that place a premium on accuracy or you had better bring an imaginative short game to get up and down from some very tricky spots. Accuracy is also required from the tee on many holes, which on paper look on the short side but don’t let numbers fool you, there is plenty of trouble meaning that par is always a very good score.

With all of that said, good golf will be rewarded and the committee and members of the club look forward to seeing you at the club soon.

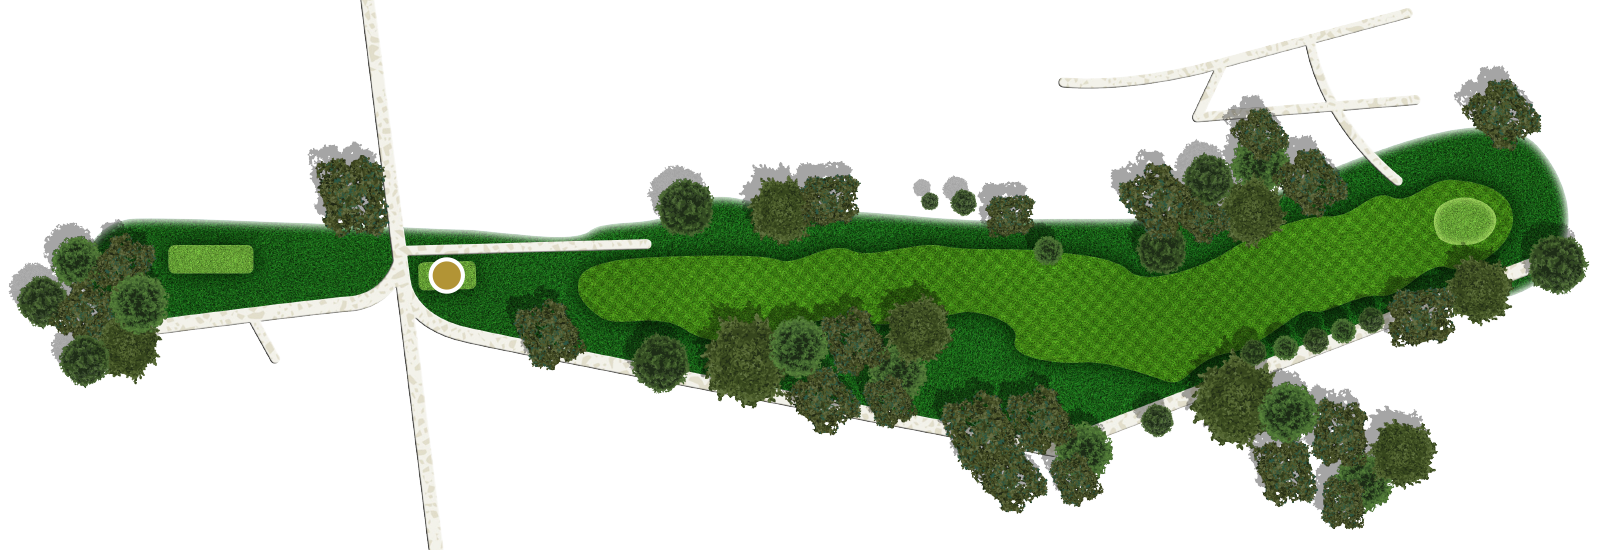
Hole 1

Par 3 – 126 Metres

Local Insight:
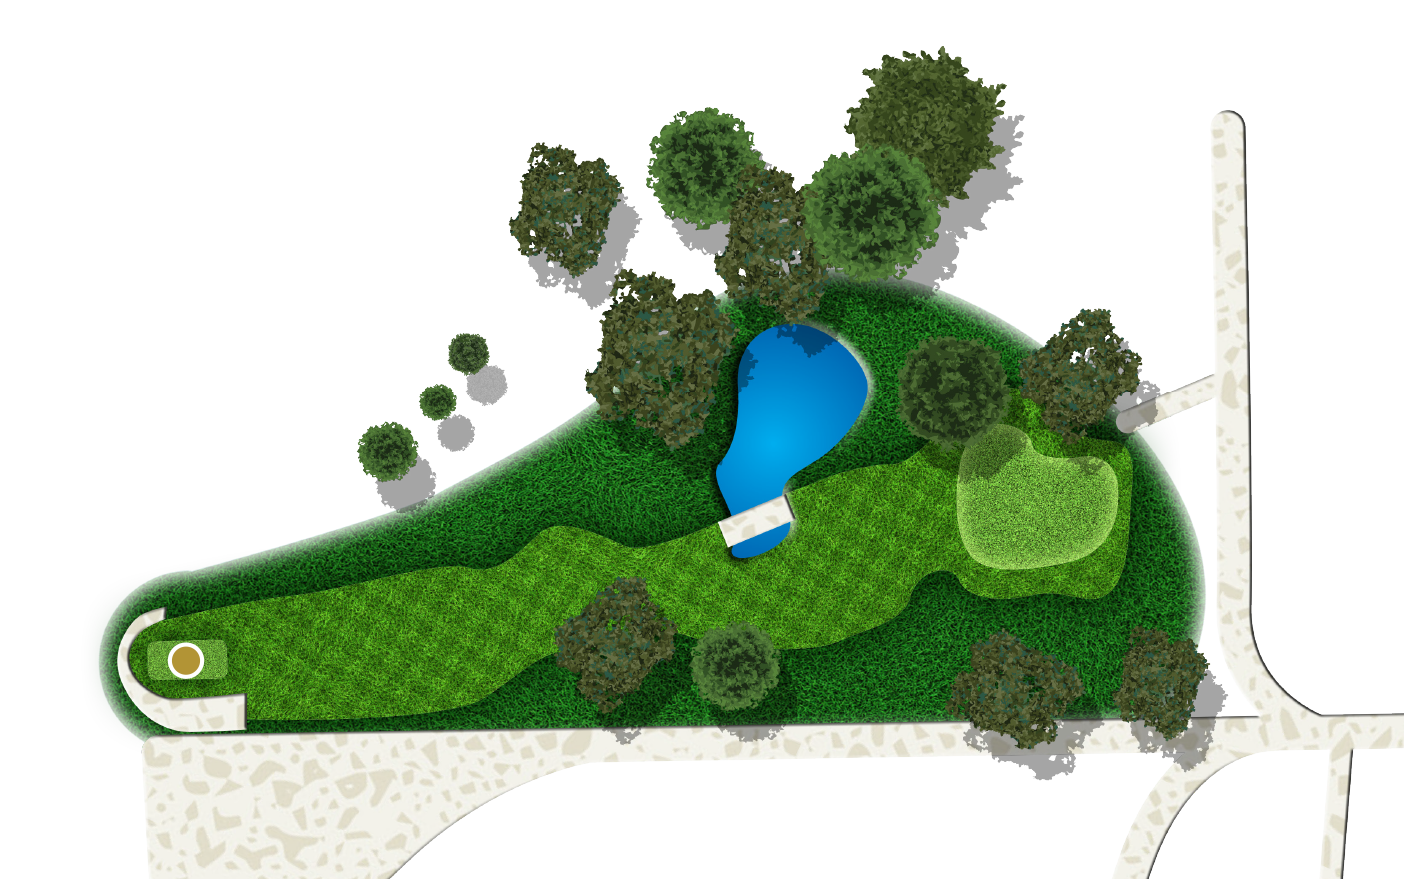
Rated as the easiest hole on the course, the short first is an ideal way to start your round. Normally requires a short iron to the green, which is slightly elevated from the tee. There is a dam well short and to the left that shouldn’t be in play, however if you miss the target short or right then you will likely face a tricky up and down. The green is comparatively large with subtle breaks so just hitting the green doesn’t necessarily guarantee your par. Pay attention otherwise you may well walk off with a 4 or more.

Hole Sponsor:
Celebrations-MONO

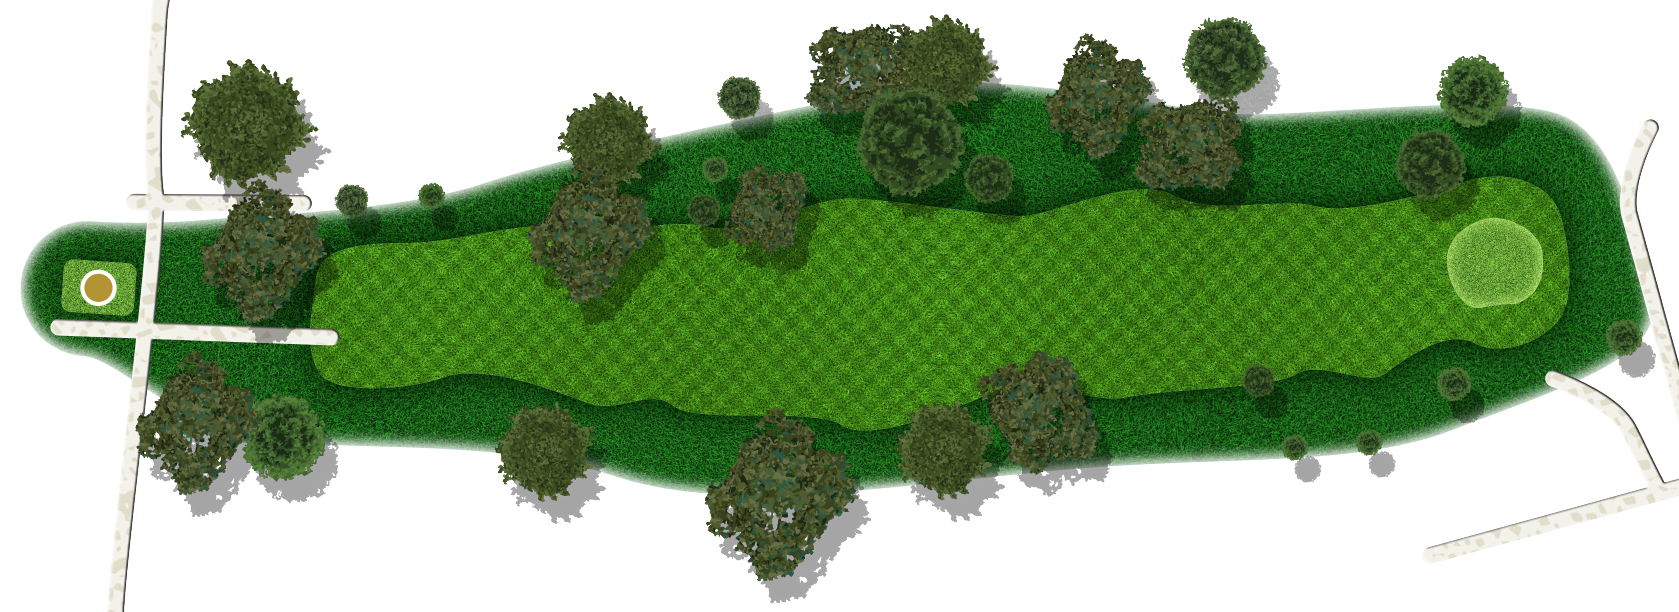
Hole 2

Par 5 – 489 Metres

Local Insight:
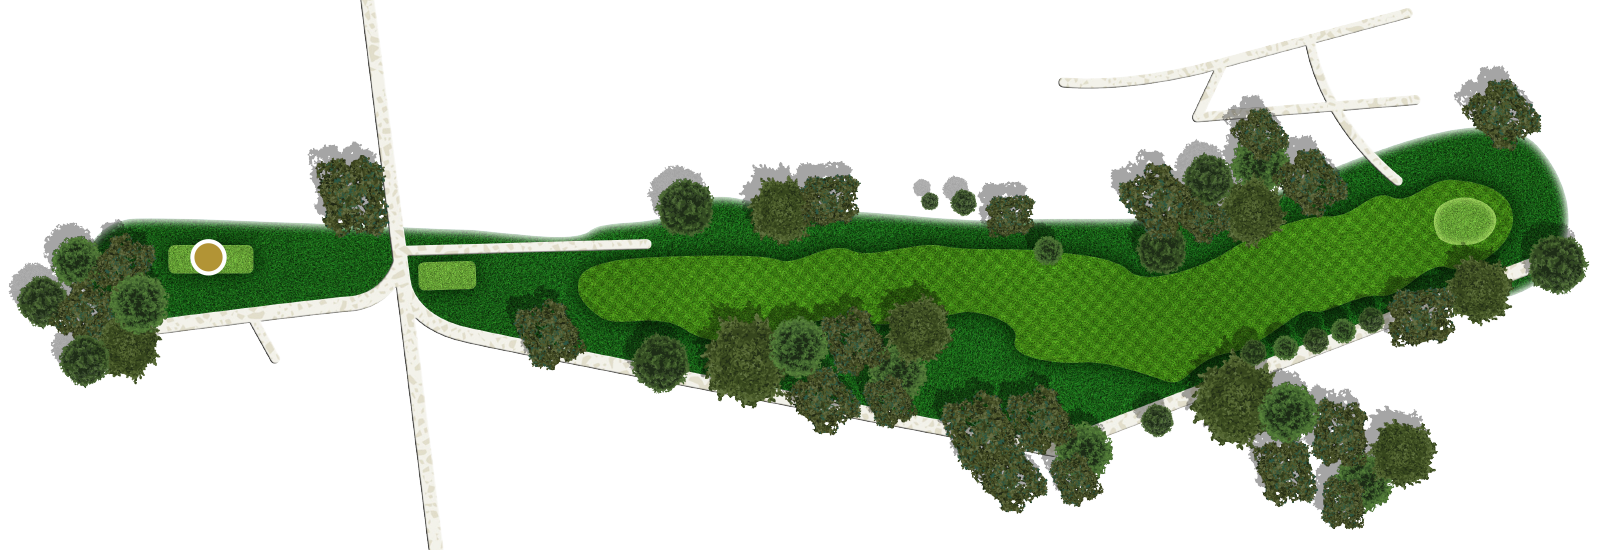
Hope you have warmed up by now, as this hole requires length and precision. It is a genuine 3 shot hole for all but the longest of hitters. Out of bounds right of the fairway means many players bail out left, where the trees lurk to make you next shot harder. Assuming you have hit a good straight drive, your next shot can be played from a side hill or upslope lie which makes hitting the longer club required a real challenge. Trees line the fairway left and a large valley cutting through the fairway starting at the 160m mark extending through to 100m means that you may well have a blind 3rd shot. Again, out of bounds lurks on the right, with trees on the left at around the 100m mark that are reminiscent of a maze!

The green is no snack either, a false edge on the left means anything but a well struck shot may roll off the green leaving a hard to judge up and down. A raised back edge means anything long is no good and putting down hill on this green when the greens are fast means that this hole is a beauty. Walk off with a 5 and be happy about it, a birdie is a real bonus.

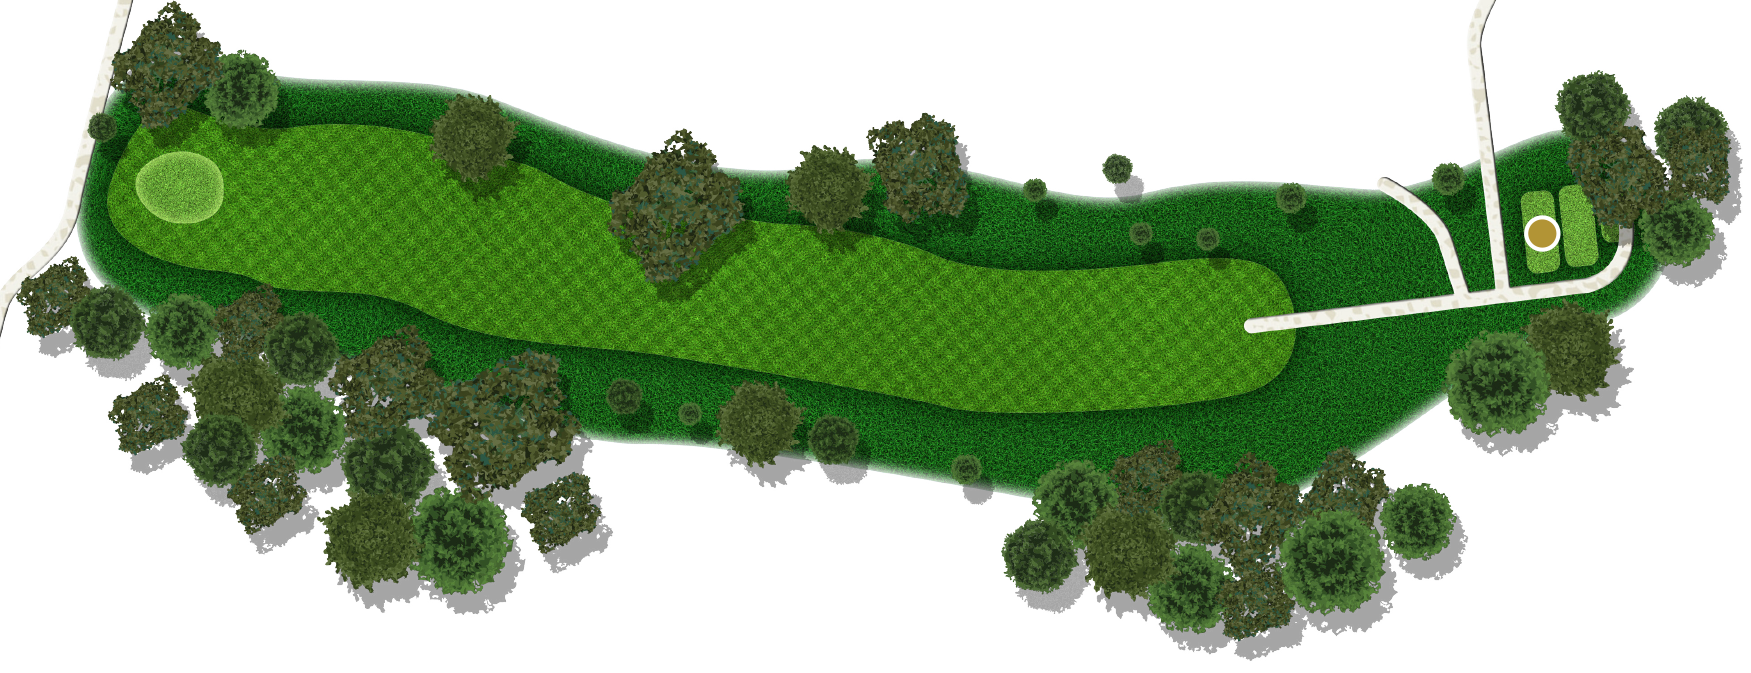
Hole 3

Par 4 – 334 Metres

Local Insight:
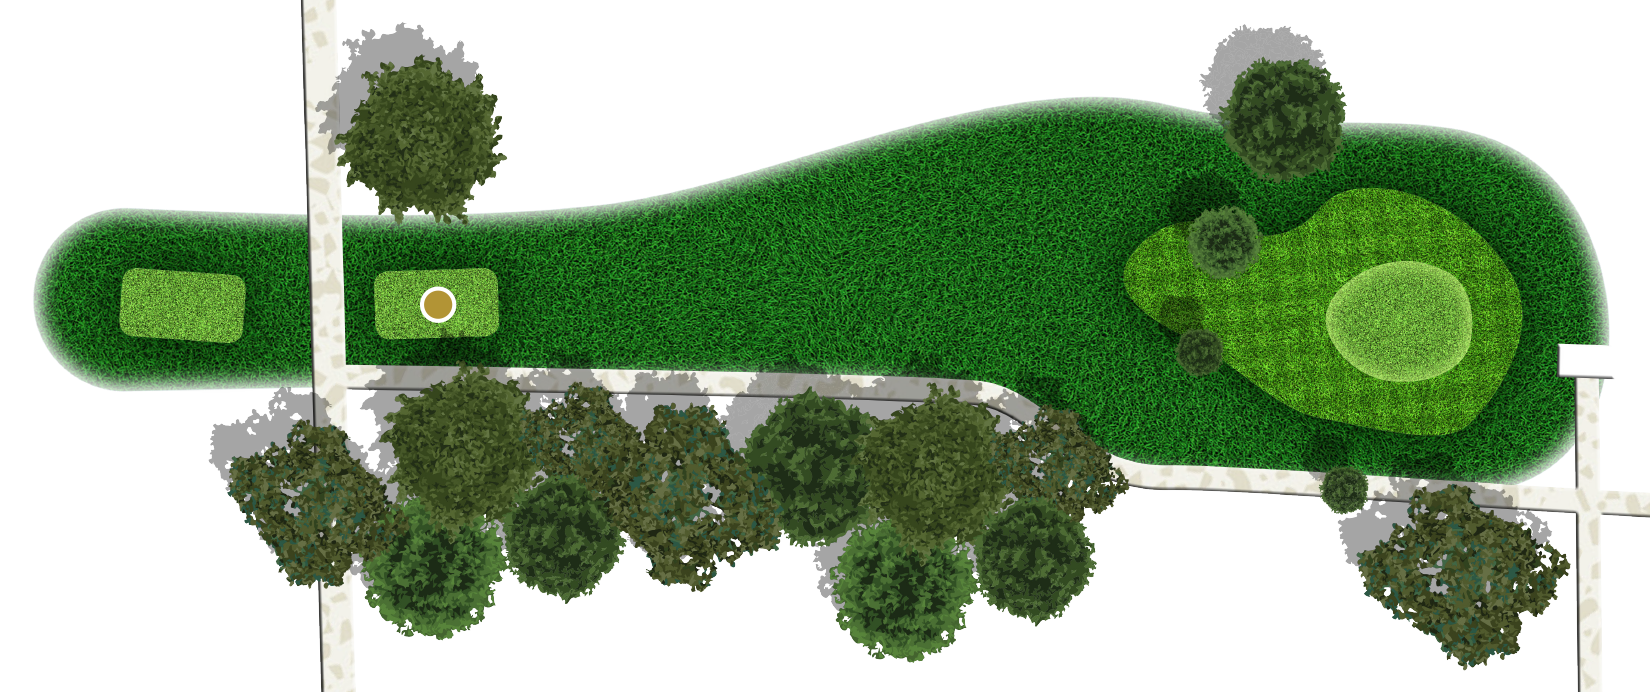
OK, so if you have made a good start, now is not the time to get complacent. The tee shot here needs to be well struck, with a gradual bank starting at around 160m from the green means that you need to carry your drive a little over 210m to make it to the top. A large blackwood on the right blocks the right hand side of the green, whilst the left hand side of the fairway narrows appreciably due to the over-hanging branches. A straight well struck tee shot will set you up for a downhill second shot to a small green which slopes from back to front with fall offs on both sides and a large drop off at the rear. The green itself has subtle breaks and only solid committed putts generally drop.

Hole Sponsor:

BGA-Insurance-MONO

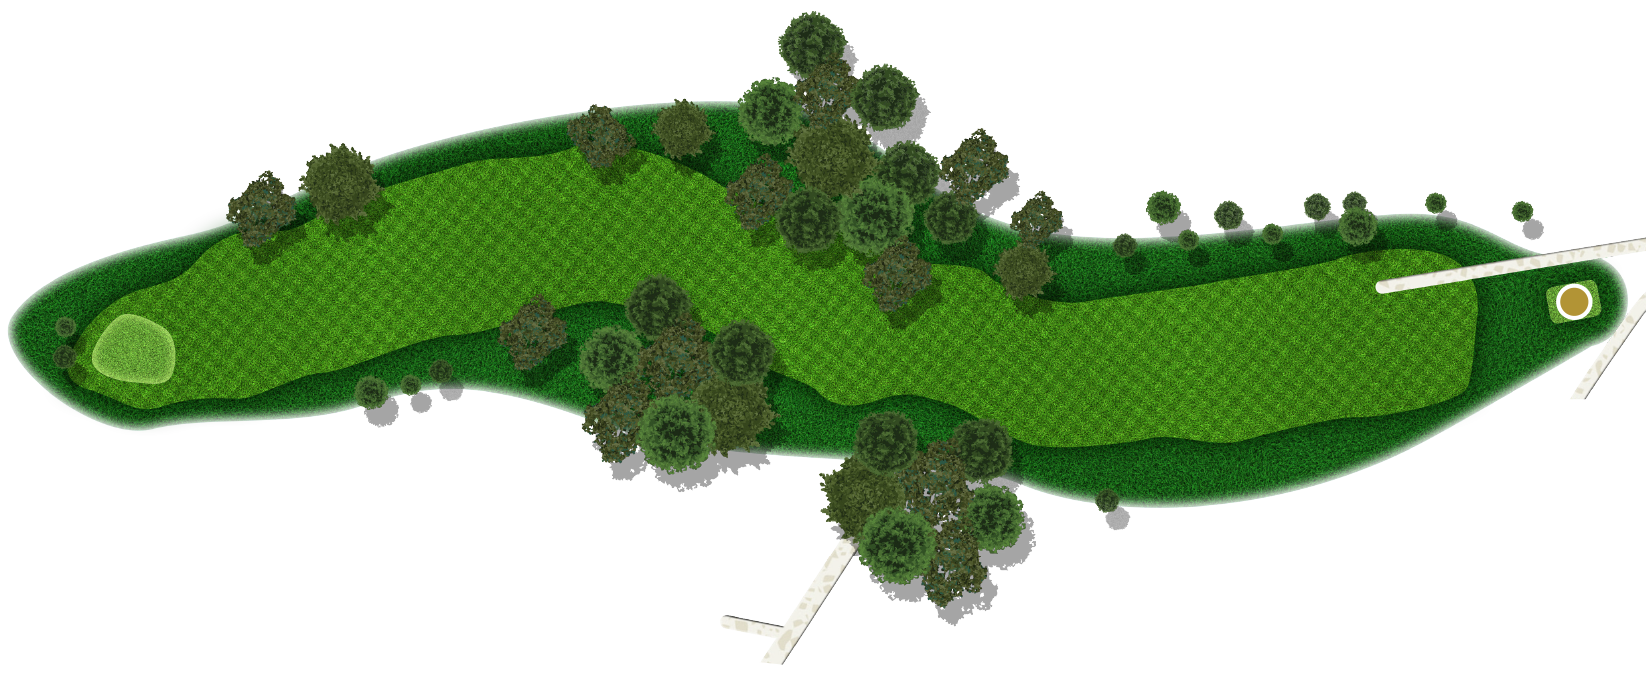
Hole 4

Par 4 – 341 Metres

Local Insight:
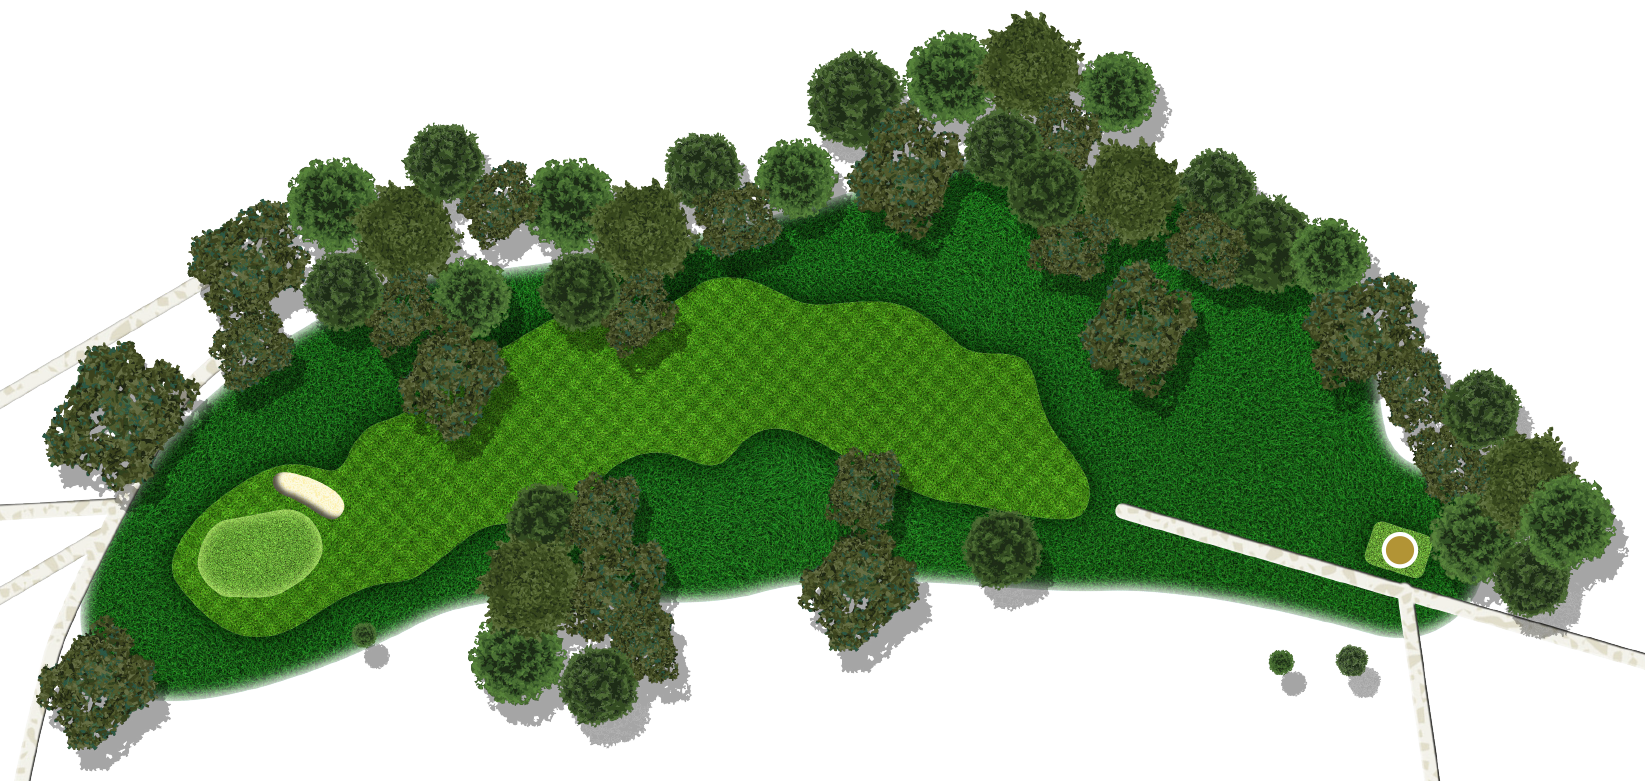
Finally an easier tee shot. The fairway is wide and you shouldn’t have a problem hitting it. Note – you shouldn’t! Trees on either side are ready to catch errant shots. Once you have safely negotiated your tee shot, a middle to short iron second shot to a green sloping back to front again needs to be struck well. The prevailing breeze coming through the Valley will generally mean that you need at least one club more than you would normally need. A bunker on the right waits to grab any shots to the right of the green, whilst getting up and down from the left is also a challenge as the green generally slopes away from you. If you are above the hole, watch your speed and play plenty of break, this green moves more than you think.

Hole Sponsor:

Bridgestone-MONO

Hole 5

Par 4 – 321 Metres

Local Insight:
This one plays with the prevailing breeze, meaning it’s tempting to wind up on a drive leaving a short shot to this green. Out of bounds flanks the right side of this hole for the entire length, along with a large open cut hazard that sits just inside the fence line. A large gum on the left of the fairway catches lots of tee shots where players bail out. A good drive will leave a short shot to a green that sits below the level of the majority of the fairway. Again, the green slopes gentle from back to front with large fall offs left, right and at the rear. The green has lots of little slopes and anything to the left half of the green with any speed will roll off and leave you with a really delicate chip shot. The green itself has some sharp breaks, so when you have hit your tee shot on the adjacent fourth tee, have a sneaky look where the pin is and aim to leave yourself with an easy putt. This is one is a real birdie chance for the better player.

Hole Sponsor:

NC-Griggs-Butcher-MONO

Hole 6

Par 3 – 141 Metres

Local Insight:
Time to cross the road. If you have started well, play smart. This hole has two large gum trees which you must shoot between to hit this green. If you hit a high ball, you can go over them with a bit of shape. The green slopes hard from back to front again leaving difficult up and downs if you miss anywhere but short. Once on the green, best be under the hole as the break on this hole, especially if the pin is towards the back of the green makes for an interesting hard breaking putt. Hitting the green means that you should walk off with a par or if you are a good putter – a rare 2.

Hole Sponsor:

Hole 7

Par 4 – 334 Metres

Local Insight:
So this is where Huon Valley is a little different from most courses you will play. Holes 1 – 6 are played from alternate tees for each 9, whilst holes 7, 8 & 9 are stand alone. The 7th hole is the start of a tough stretch of holes where you can make birdies or bogey’s very quickly. The tee shot is a tough one for many players, with tall trees on the right meaning that your tee shot needs to be shaped left to right, with the hole turning well right at around 200 metres off the tee. Left is the safer line, however this leads to a longer second shot and anything straight through the fairway can mean you have a problem with some tall Blackwood trees.

Assuming you hit the fairway, a drive of 200 metres will leave you with a short iron into a large green that is shaped a little like an upside down dinner plate. The green does slope from back to front and anything long will leave you with a very tough up and down. Beware of side hill putts if the pin is at the rear of the green, play more break than you think!

Hole Sponsor:

Robbie-Griggs-Electrical-MONO

Hole 8

Par 4 – 306 Metres

Local Insight:
Rated as the 2nd hardest hole on the course, the 8th is a dog leg left that requires real attention. For long hitters who can move the ball, a well struck tee shot will give you a real opportunity for birdie, however this is the exception rather than the rule. A tee shot into the left rough (or even left side of the fairway) can leave you totally blocked off by tall trees and may mean that you need to pitch out. A tee shot well right may mean a visit to a lateral hazard that runs parallel to the fairway, meaning a chip out or drop is required. A well struck tee shot in the middle of the fairway will leave you with a short iron approach, beware of the bunker short right especially if the pin is cut just over it.

The green can be somewhat deceiving, with the front 2/3 being pretty flat, whilst the rear third again slopes from back to front. 2 putting to a rear pin position is a good achievement, especially if you have a long side-hill putt. Play more break than you think if this is the case.

Hole Sponsor:

Bells-Removals-MONO

Hole 9

Par 5 – 452 Metres

Local Insight:
This is one of the courses signature holes. A long double dog leg that requires a level of patience as getting greedy on this hole can cost you. A semi blind tee shot is required, over the crest of the raised fairway ahead of you with a little left to right shape. Trees on the right will present an interesting challenge if you miss the fairway, whilst a large tree on the left means that you need to shape your next shot from right to left with an ideal aim point being the two large gums on the right of the fairway at around the 130m mark.

Assuming you have negotiated the first two shots successfully, your third will be from around 100-150m and be straight away. The green is guarded by a bunker on the right, with out of bounds running along the right of the fairway and two large gum trees guarding anything coming in from the left hand side of the fairway. Missing the green left always leaves a tough up and down with a real touch shot required.

Walk off here with a solid par and be well satisfied.

Hole Sponsor:

Jackmans-Bodyworks-MONO

Hole 10

Par 3 – 142 Metres

Local Insight:
So hopefully you have enjoyed the first 9 and got off to a good start. Welcome to the 10th. As mentioned earlier, the first 6 holes of the back nine play to the same green as holes 1 to 6. This means that the 10th is simply a longer version of the 1st, although the longer shot requires one or two more clubs and remember, short or right will leave a tricky up and down. A well struck tee shot should leave you with an opportunity to make a 2, although don’t get greedy if the pin is front left as you can rush by the hole quite easily and walk off with a three putt bogey.

Hole Sponsor:

Tasmania-Private-Realty-MONO

Hole 11

Par 4 – 392 Metres

Local Insight:
Welcome to the hardest hole on the course. Sharing the same fairway and green as the second hole, the 11th hole can be a brute especially if the prevailing wind is blowing hard. This will mean the hole plays longer into the wind and your tee shot will need to be well struck to get to the top of the bank. Longer hitters can get to the bottom of the gully and you definitely don’t want to hit your tee shot left of the fairway as this will mean that your second shot to the green is blocked. Anything right will leave you with a long shot from a side hill slope.

Assuming you hit a cracker of a drive around 220m from the tee, you will now likely have a blind 2nd shot to the raised green. Remember the false edge on the left off the green and take more club if the wind is up, you will need it.

Hit two great shots, take your 2 putts and move to the next hole as quick as you can as par is a great score here.

Hole Sponsor:

Roberts-MONO

Hole 12

Par 4 – 335 Metres

Local Insight:
The 12th tee is well to the right of the 3rd, however the holes play pretty much the same length. Your tee shot on the 12th is the key. The hole bends sharply from left to right, with a tree on the right exaggerating this shape even further. This is a tree lined fairway and accuracy is a must. A tee shot of around 220m with shape will get you to the top of the bank and make your next shot a lot easier, looking down at the green with a shot of around 120-130 meters.

Again, be accurate or miss short as this is a lot easier up and down than missing pin high, it’s tough to get up and down especially if you short side yourself.

Hole Sponsor:

Clennets-Mitre-10-MONO

Hole 13

Par 5 – 433 Metres

Local Insight:
Here is a birdie hole for the long hitters with a relatively short par 5. The tee shot needs to be well struck and ideally shaped a little left to right to match the slight dog leg off this tee which is located some 90 metres behind the 4th. Trees line the fairway on both sides, so accuracy is needed otherwise a good recovery shot will be required. A well struck drive of around 230m will leave a shot of 200-215m. Long hitters have the opportunity to score here, whilst the shorter hitter can also benefit if they strike a solid short iron. The bunker on the right lurks for the errant shot, whilst long and left will present all sorts of difficulty especially if the pin is on the left hand side.

Hit solid shots on this hole and you may very well leave with a well deserved birdie.

Hole Sponsor:

Hole 14

Par 4 – 322 Metres

Local Insight:
Very much the same hole as described on the 5th, with the length of the hole being the same with the tee being only slightly to the right of the 5th hole. No need to complicate this hole, you have had a virtual practice run with the 5th so if you made a mistake first time round, here is your opportunity to correct it. Remember the out of bounds is just right of the fairway, stay away!

Hole Sponsor:

Good-Year-MONO

Hole 15

Par 3 – 167 Metres

Local Insight:
This is another tough hole, playing nearly 40 metres longer than the 6th hole with the tee shot being played from the other side of the road. This means this time round you will have a long iron in your hands or some lumber of some sort. Given that you need to hit between the two large trees, you will need to be accurate. The trickiness of the green was described for the 6th hole – so all up, walk off here with a 3 and be very happy!

Hole Sponsor:

Hole 16

Par 4 – 300 Metres

Local Insight:
So this is the first of 3 stand alone holes to finish with and this is seemingly the most straight forward, however there are hazard drain’s that run parallel to the fairway. A large tree that overhangs the fairway on the left around 80m from the tee means that your tee shot needs to be shaped right to left. A well struck tee shot is important and sets you up with a short iron to the hard sloping green (back to front), which features a small ridge on the right. A pin tucked back right here is the most challenging and anything long or right means that you will need a small bucket of balls to make an up and down.

A well struck shot just short of the pin leaving an uphill putt will leave you with a real opportunity for a birdie.

Hole Sponsor:

JW-BA-Paul-Builders-MONO

Hole 17

Par 4 – 341 Metres

Local Insight:
So you have arrived at the penultimate hole and hopefully you have put together a good score to this point, well hang on because this hole is challenging especially for one of this length. A short sharp climb up hill to the elevated tee will give you a great view of the course, and if your heart rate is not up from the short climb, what you see when you look down at the fairway will certainly quicken the pulse. The fairway shapes left to right, with out of bounds all the way down the left so this is not an option. Look to the right and you will see trees, with a large row of gum trees starting at around 140 meters from the green. Just to the right of these trees is a lateral hazard that also must be avoided. No pressure.

So assuming that you have hit a great tee shot – you will now have somewhere around 130-150m to the green which is elevated at the rear again creating a slope from back to front. If you miss the green, miss it short as this again is the easiest up and down. Hit the green and you should have a good opportunity to make a 3 but be well satisfied if you walk away with a par.

Hole Sponsor:

Graham-Family-Funerals-MONO

Hole 18

Par 5 – 443 Metres

Local Insight:
The road home! Running parallel to the 9th hole, this hole also features a double dog leg and presents an opportunity to close with a birdie especially for the long hitter. A solid drive to the top of the hill, will leave a straight away 2nd shot to set you up for a third of around 120m. For the long hitter who is a little braver, a tee shot over the hill to the right will leave you with a crack at the green, usually with a little right to left required. Anything to the left off the tee will mean you are blocked by a large stand of gum trees, however you can get lucky and see some gaps if you are very brave!

If you playing from the middle of the fairway for your third, this green has some slope from back to front with some humps and hollows allowing the pin to be tucked away a little some days. Missing the green here is not the end of the world, this is one green where you don’t have as many slopes to deal with so you should get up and down. If you have hit the green in either 2 or 3, hopefully you will make the putt and walk away from your round with a great memory!

Hole Sponsor: